Common Fiberglass Pool Installation Mistakes
This blog article was originally written by Michael Bowers, President of Pool Pros Inc of Green Bay WI. The article is the sole property of Pool Pros Inc
Like anyone that has been in the pool business as long as I have been can honestly say that if it’s possible to make a mistake with a fiberglass pool we have probably done it, or at least seen it. Good news is we are quick learners and don’t make the same mistake twice and even better at learning form others mistakes too.
. Our goals are to, Educate and empower potential pool owners with everything they need to make the most educated decision when it comes time to purchase a fiberglass pool.
1. POOR QUALITY CANTILEVERED CONCRETE POOL DECKING
No matter how well your pool builder built the pool, if the cantilevered concrete pool deck is of poor quality the entire project looks bad. We had a rude awaking on our first cantilevered pool deck when our concrete guy who had been pouring concrete for 30 plus years left us with a pock marked mess.
When the Stegmeier forms were removed the day after the poor, we were shocked to find the edge filled with pits and
pock marks. We had to scramble to come up with a solution to this issue as it made the entire project look horrible. While the concrete was still green enough we used a rub brick to knock down imperfections and used a slurry mix that was hand rubbed into the profile to fill in any voids and imperfections. While it took a lot of work in the end it turned out great. This problem illustrates the fact that just because a concrete contractor may have a tremendous amount of experience, nothing can replace experience with disposable Stegmeier forms.
We have learned several valuable lesson on those early projects that have saved us countless hour of work and improved the look of each pool deck.
A: Proper Form Installation: We have found that it requires 2 times the amount of tie wires recommended by Stegmeier to hold the forms in place. It also help to tape the forms together with duct tape which also helps prevent the form ties from pulling through the form.
B: Concrete Placement: This is critical as the concrete has to be gently placed against the Styrofoam forms or the form can be damaged and or pushed off the pool altogether. After the concrete is placed a concrete vibrator is used to bring the cream to the face of the form. This prevents the pock marks, voids and aggregate from 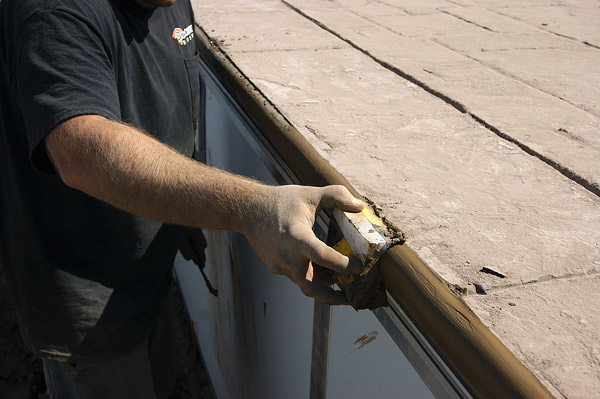 being exposed at the edge of the coping.
C: Cantilevered Form Removal: We used to wait until the next day to strip forms and address imperfections. We however do that shortly after the deck is poured. It involves getting in the pool to remove the forms and fix the edge. This is a little tricky but is easier to work the concrete at this point since it has not cured at all and can be worked over with the Styrofoam profile form from Stegmeier immediately.
2. NO GROUND WATER REMOVAL SYSTEM
This is the a very common mistake made by inexperienced builder. Every pool not just fiberglass pools need to have the ability to remove potential ground 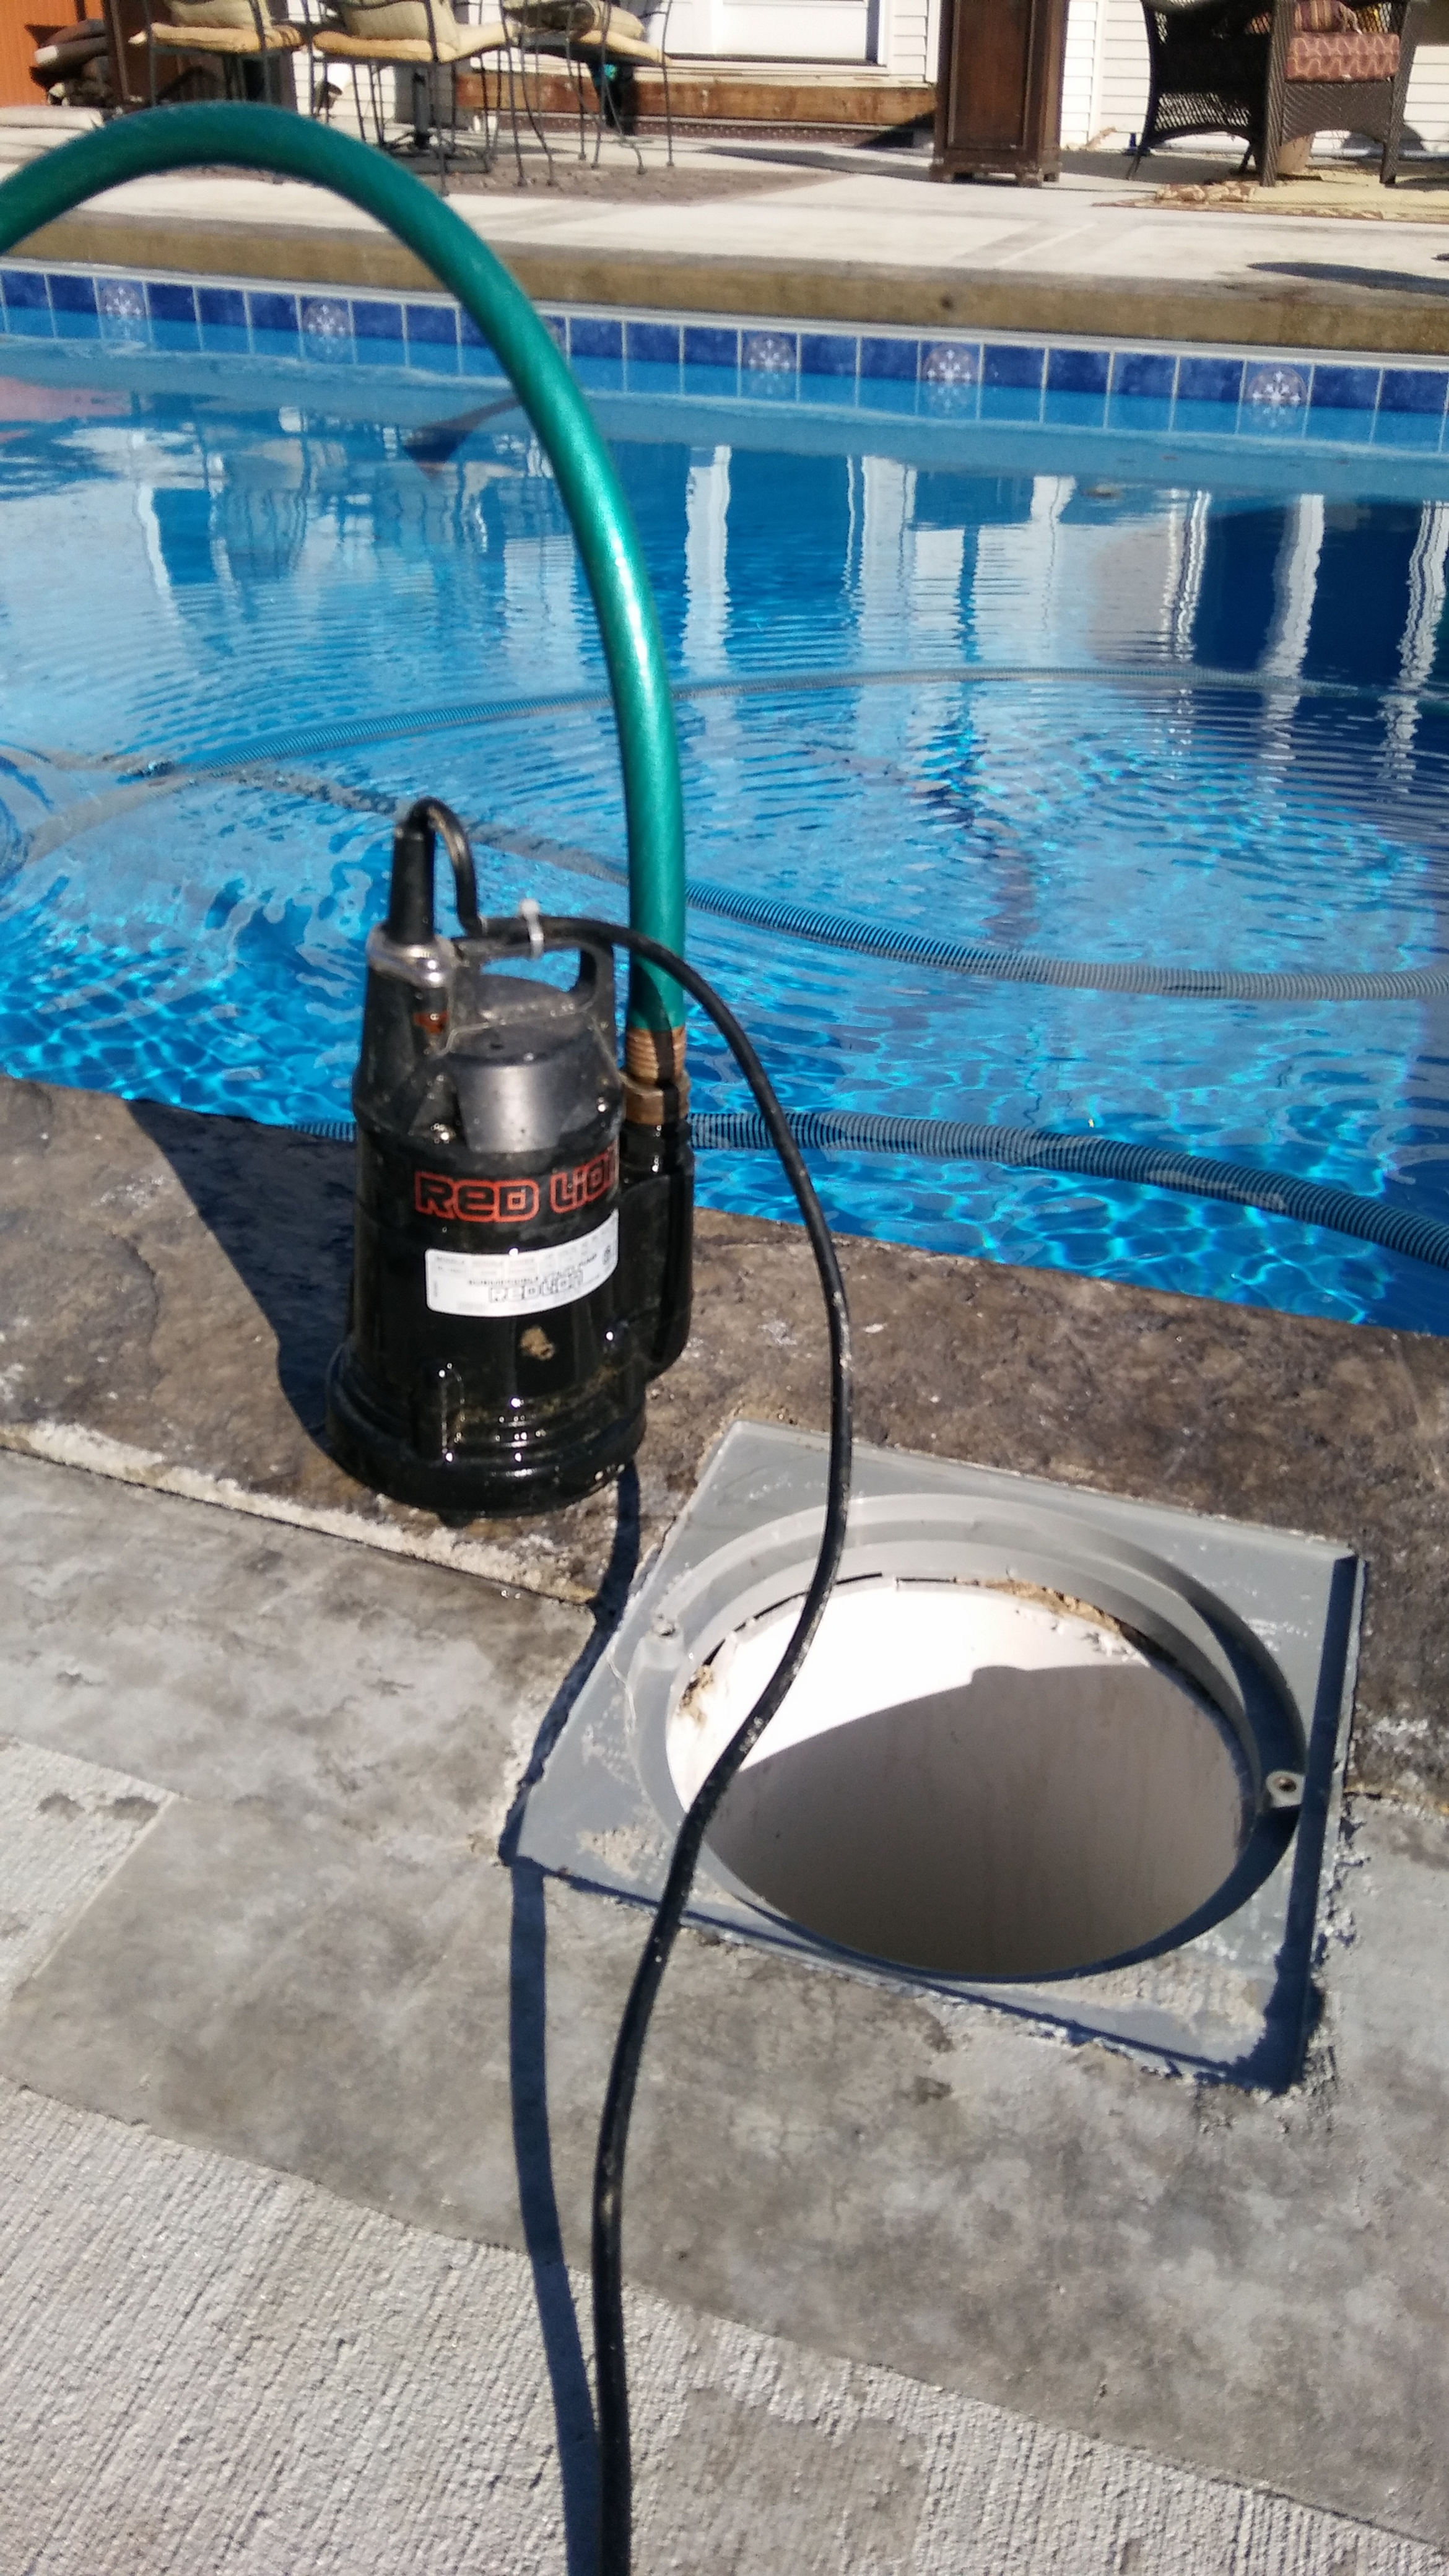 water and relieve hydro-static pressure. This is because every pool type is susceptible to floating if hydro-static pressure can’t be removed. If your pool does not have a system in place to remove ground water, it is at an elevated risk of damage from hydro-static pressure.
Pool Pros uses a sump pit system in every in-ground pool that we build. This system consists of a simple 8″ diameter schedule 40 PVC pipe that is perforated to allow ground water to flow into the pipe. The top of the pipe is finished off in the pool deck with a skimmer lid so it blends in seamlessly with the rest of the pool and decking. When needed, this skimmer lid can be removed and a submersible pump can be lowered into the pipe to pump out any ground water. This is an inexpensive component that should never be overlooked.
3. BAD PLUMBING
Plumbing is a critical component that if done incorrectly can have costly consequences down the road.
A: Wall Fittings
The biggest issue with leaks on fiberglass pools tends to be the return fittings. If you look at the fittings to the right, it is the Hayward SP1029 return fitting. While it is a great wall fit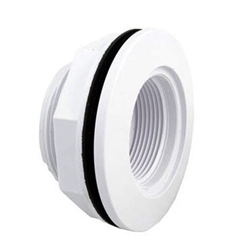 ting for an above ground pools, it should not be used on a fiberglass pool. The simple reason is that the nut on the back is 1″ wide and cannot be tighten correct
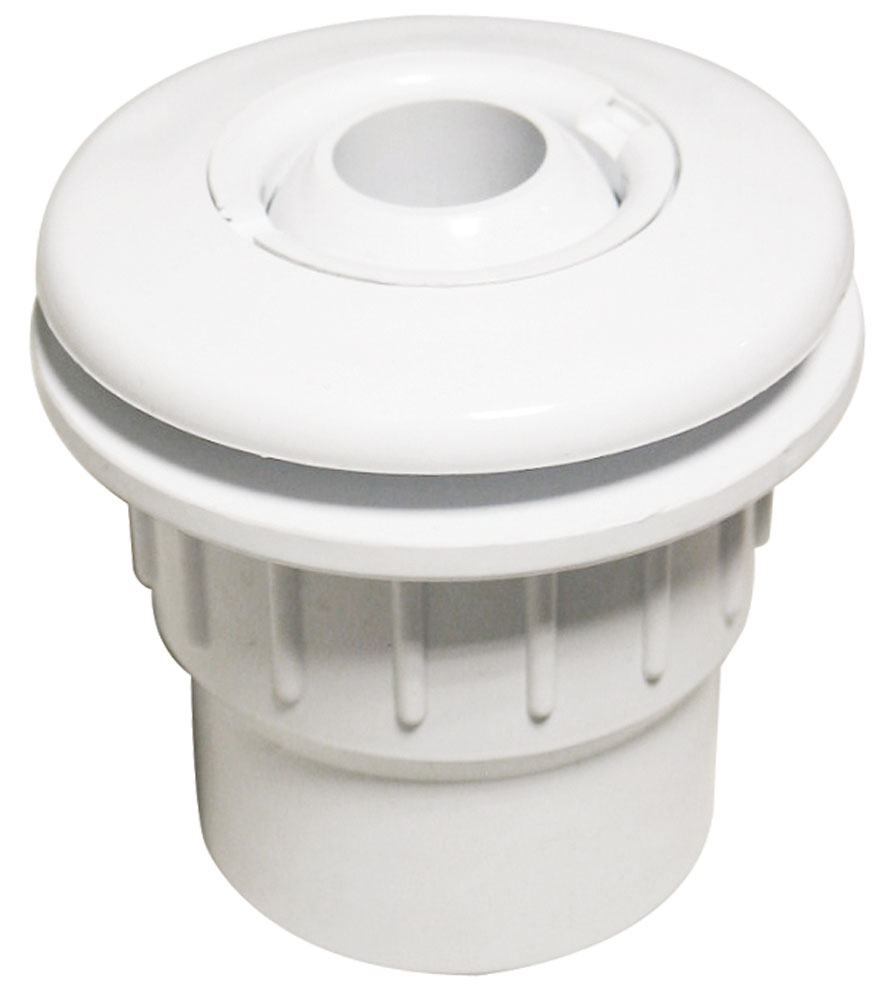 without popping off the threads. If this fitting receives any type of stress from ground movement it will break or lose its seal causing a leak.The second picture to the right is the fiberglass wall fitting from CMP. It has a 3″ wide nut that can be securely tightened to the fiberglass pool wall with no issue. You also don’t wan
B: Plumbing Support
It is critical to properly support your pool plumbing during the installation process. Having plumbing hanging horizontally from your pool puts undue stress on wall fittings and can cause leaks. That is why at Performance pools we plumb all of our pool
vertically down from the wall fittings to the base of the pool. We then run the plumbing along the compacted base of the pool. So as the gravel back-fill is being placed it will slide down the vertical pipe rather than across it. This eliminates the potential for any undue stress on the plumbing.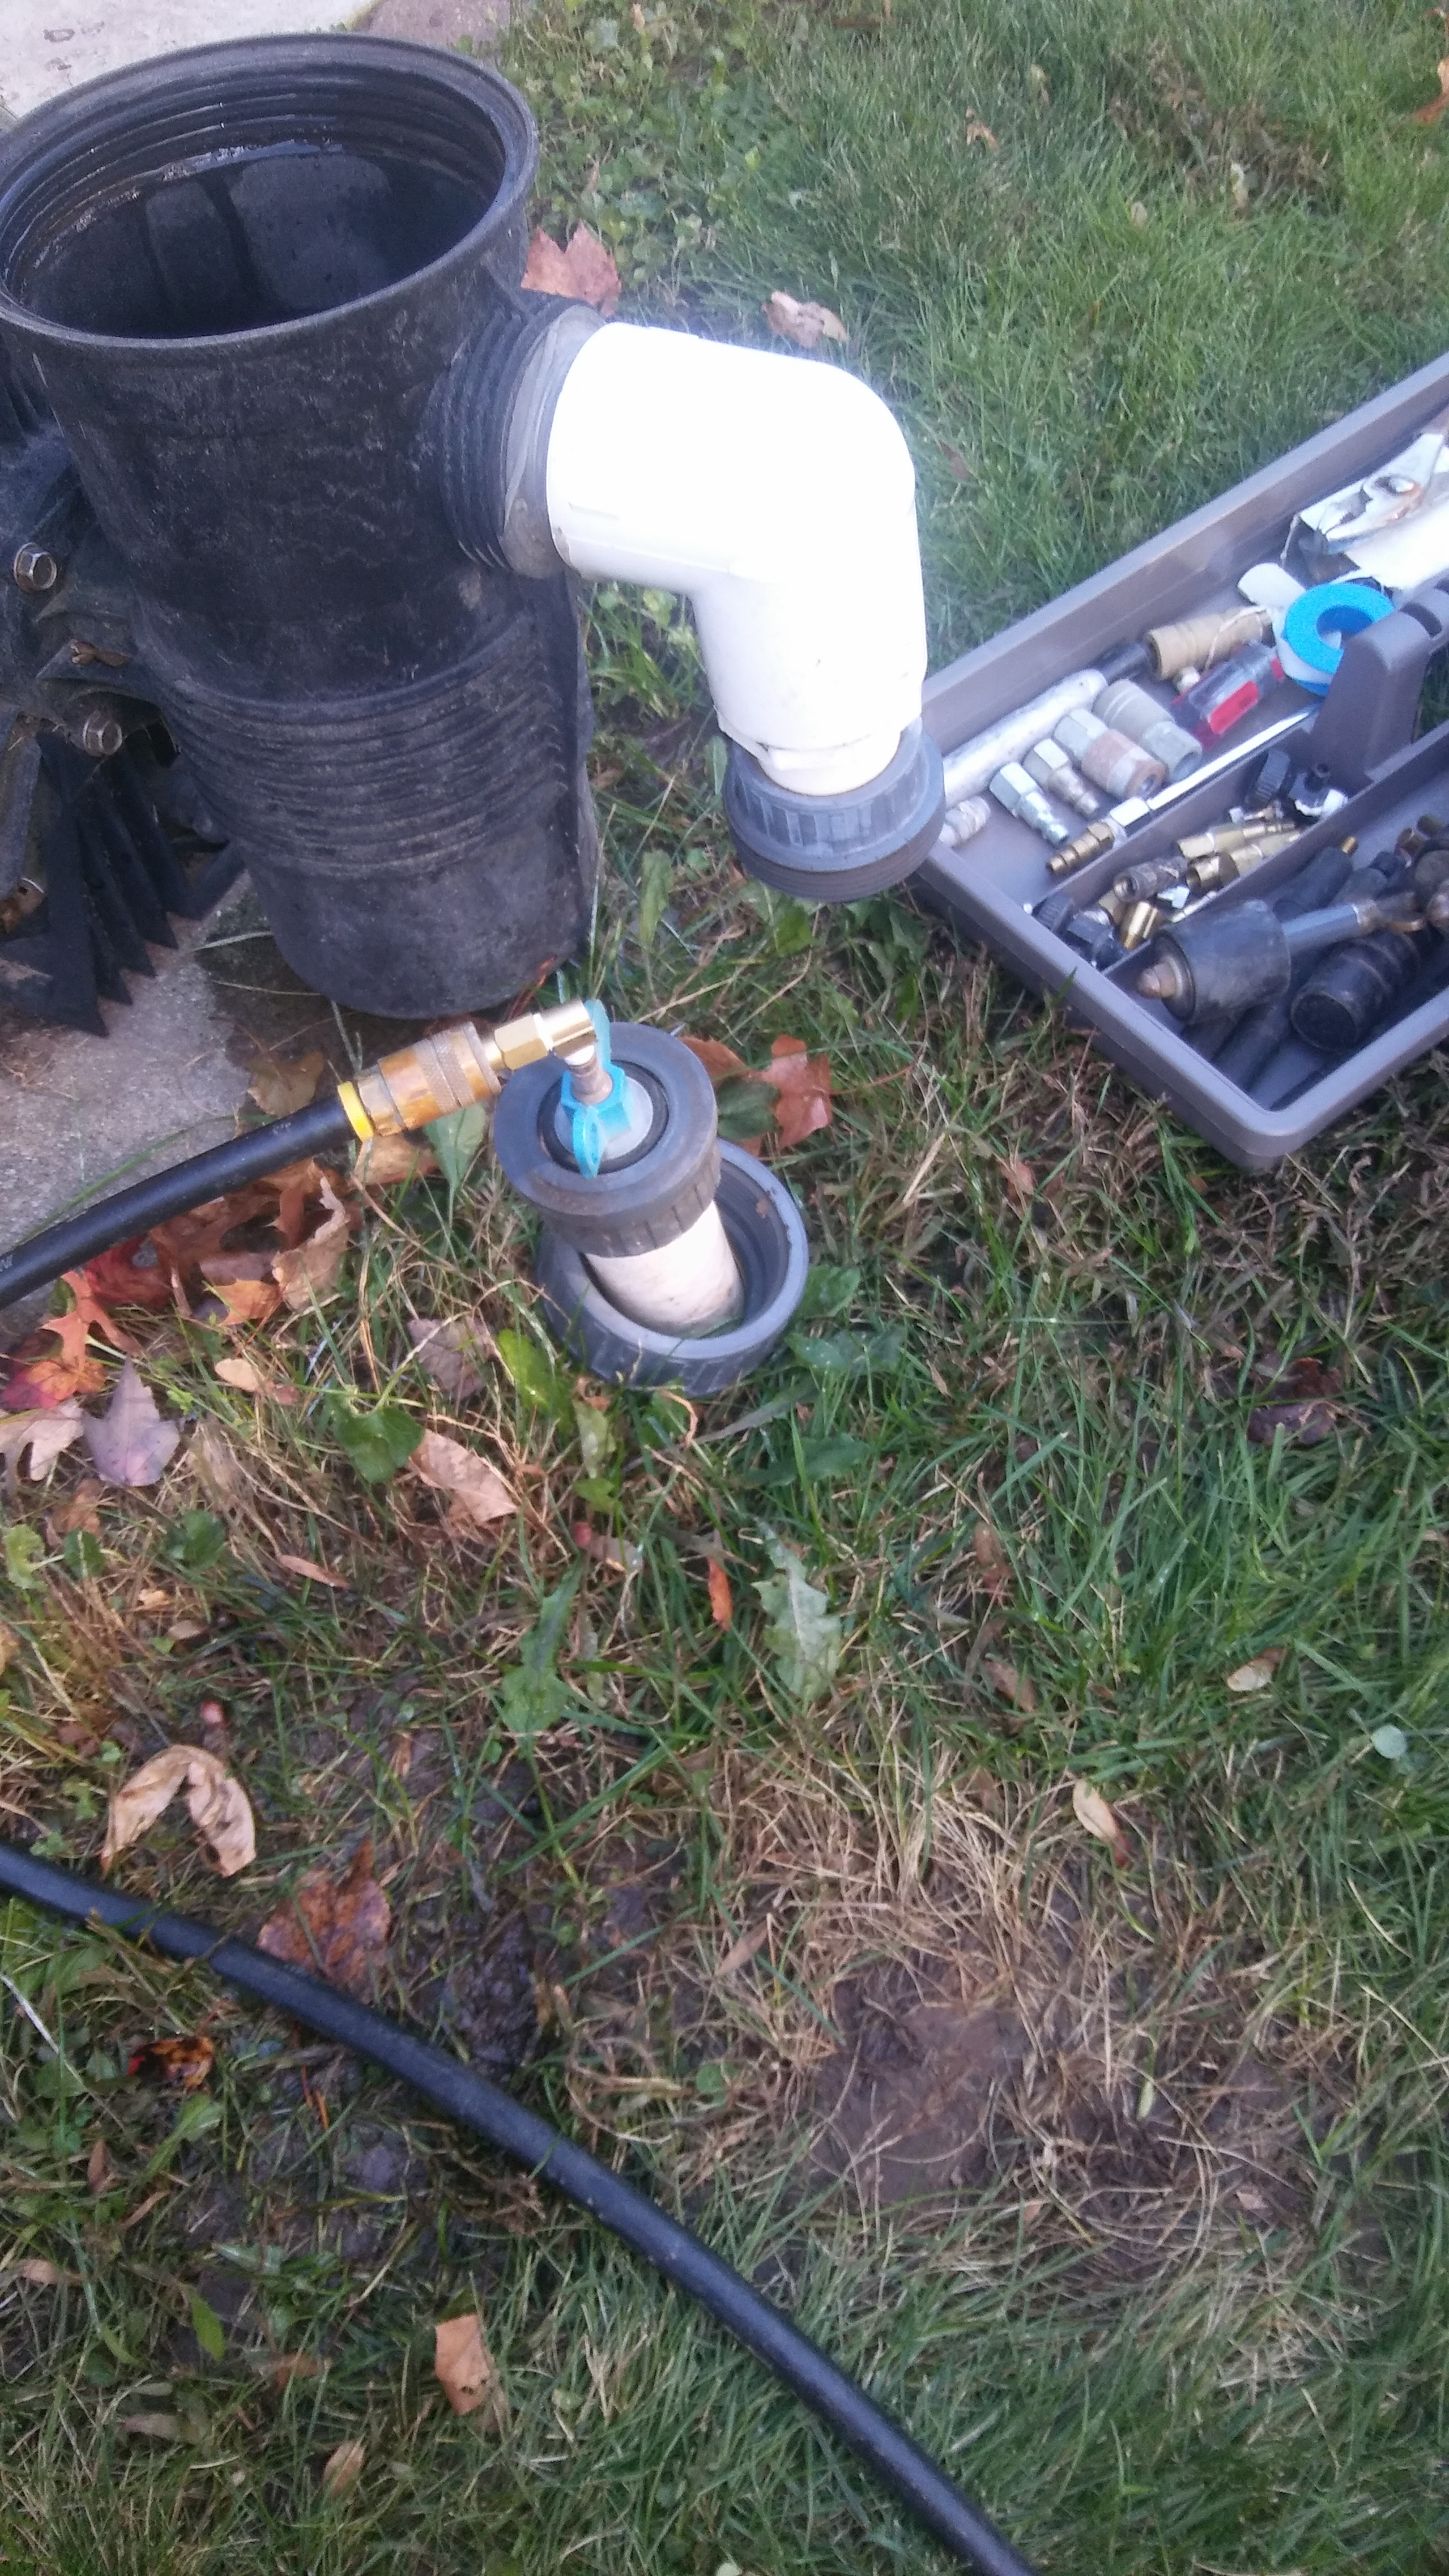
C:Pressure Testing
This is something that is typically overlooked by inexperienced builders as it requires special ,equipment that some builder just don”t want to purchase. Pressure testing is done to ensure that there are not leaks in the plumbing. Performance pools pressure tests the pool after plumbing and after back-filling but prior to pool deck installation to ensure that your pool plumbing is 100% leak free. If your builder does not pressure test your plumbing and a leak is found after the deck is poured, the plumbing will need to be exposed and repaired. This may required pool deck removal to do so. Something a 30 minute test could have prevented.
D:Proper Materials
At Performance pools we use only schedule 40 pvc. We use 2″ for pool plumbing and for spa suction lines we use 3″ to get the increased flow rates to provide power to therapy jets in spas.
4: BOWED WALLS OR SINKING STEPS
The greatest advantage of fiberglass pools are the many differing setting benches, tanning ledges, steps, etc. The down side is if these are not back-filled properly it can lead to costly repairs.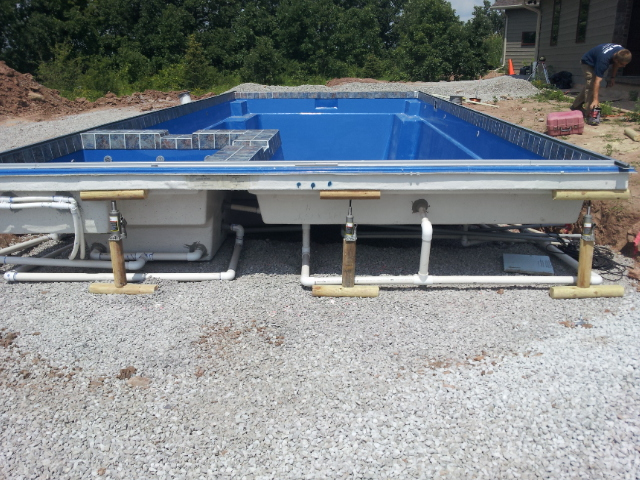
A : In a fiberglass pool with a large bench, seat or tanning ledge we use landscape timbers and bottle jacks to keep these heavy benches from sagging below level while back-filling the pool. While back-filling the pool we use 3/4 clean stone and good hard work and effort to pack the gravel under each and every step and bench in the pool. We often use 2×4’s and mini shovels to place the gravel under the steps and pack it in tightly. While this packing of steps and benches occurs we also are filling the pool with water and monitor the elevation of the these bench areas to ensure that they are still level. If needed we can make slight adjustments to the elevation with bottle jacks that we permanently leave in place.
B : Another problem that occurs on straight wall pools is that the walls will bow in or out. The key is to run a string line from corner to corner of the pool and constantly monitor the walls during the back-fill process; using the pressure of the water inside the pool or the back-fill material outside the pool to achieve a perfectly straight wall.
5: IMPROPER GRADING MATERIALS
While there is no such thing as a level yard, this is not the time to cut corners to grade out the pool area. If you have one side of your pool that needs to be raised to get the elevation up, don’t use the dirt that came from digging your pool and here is why.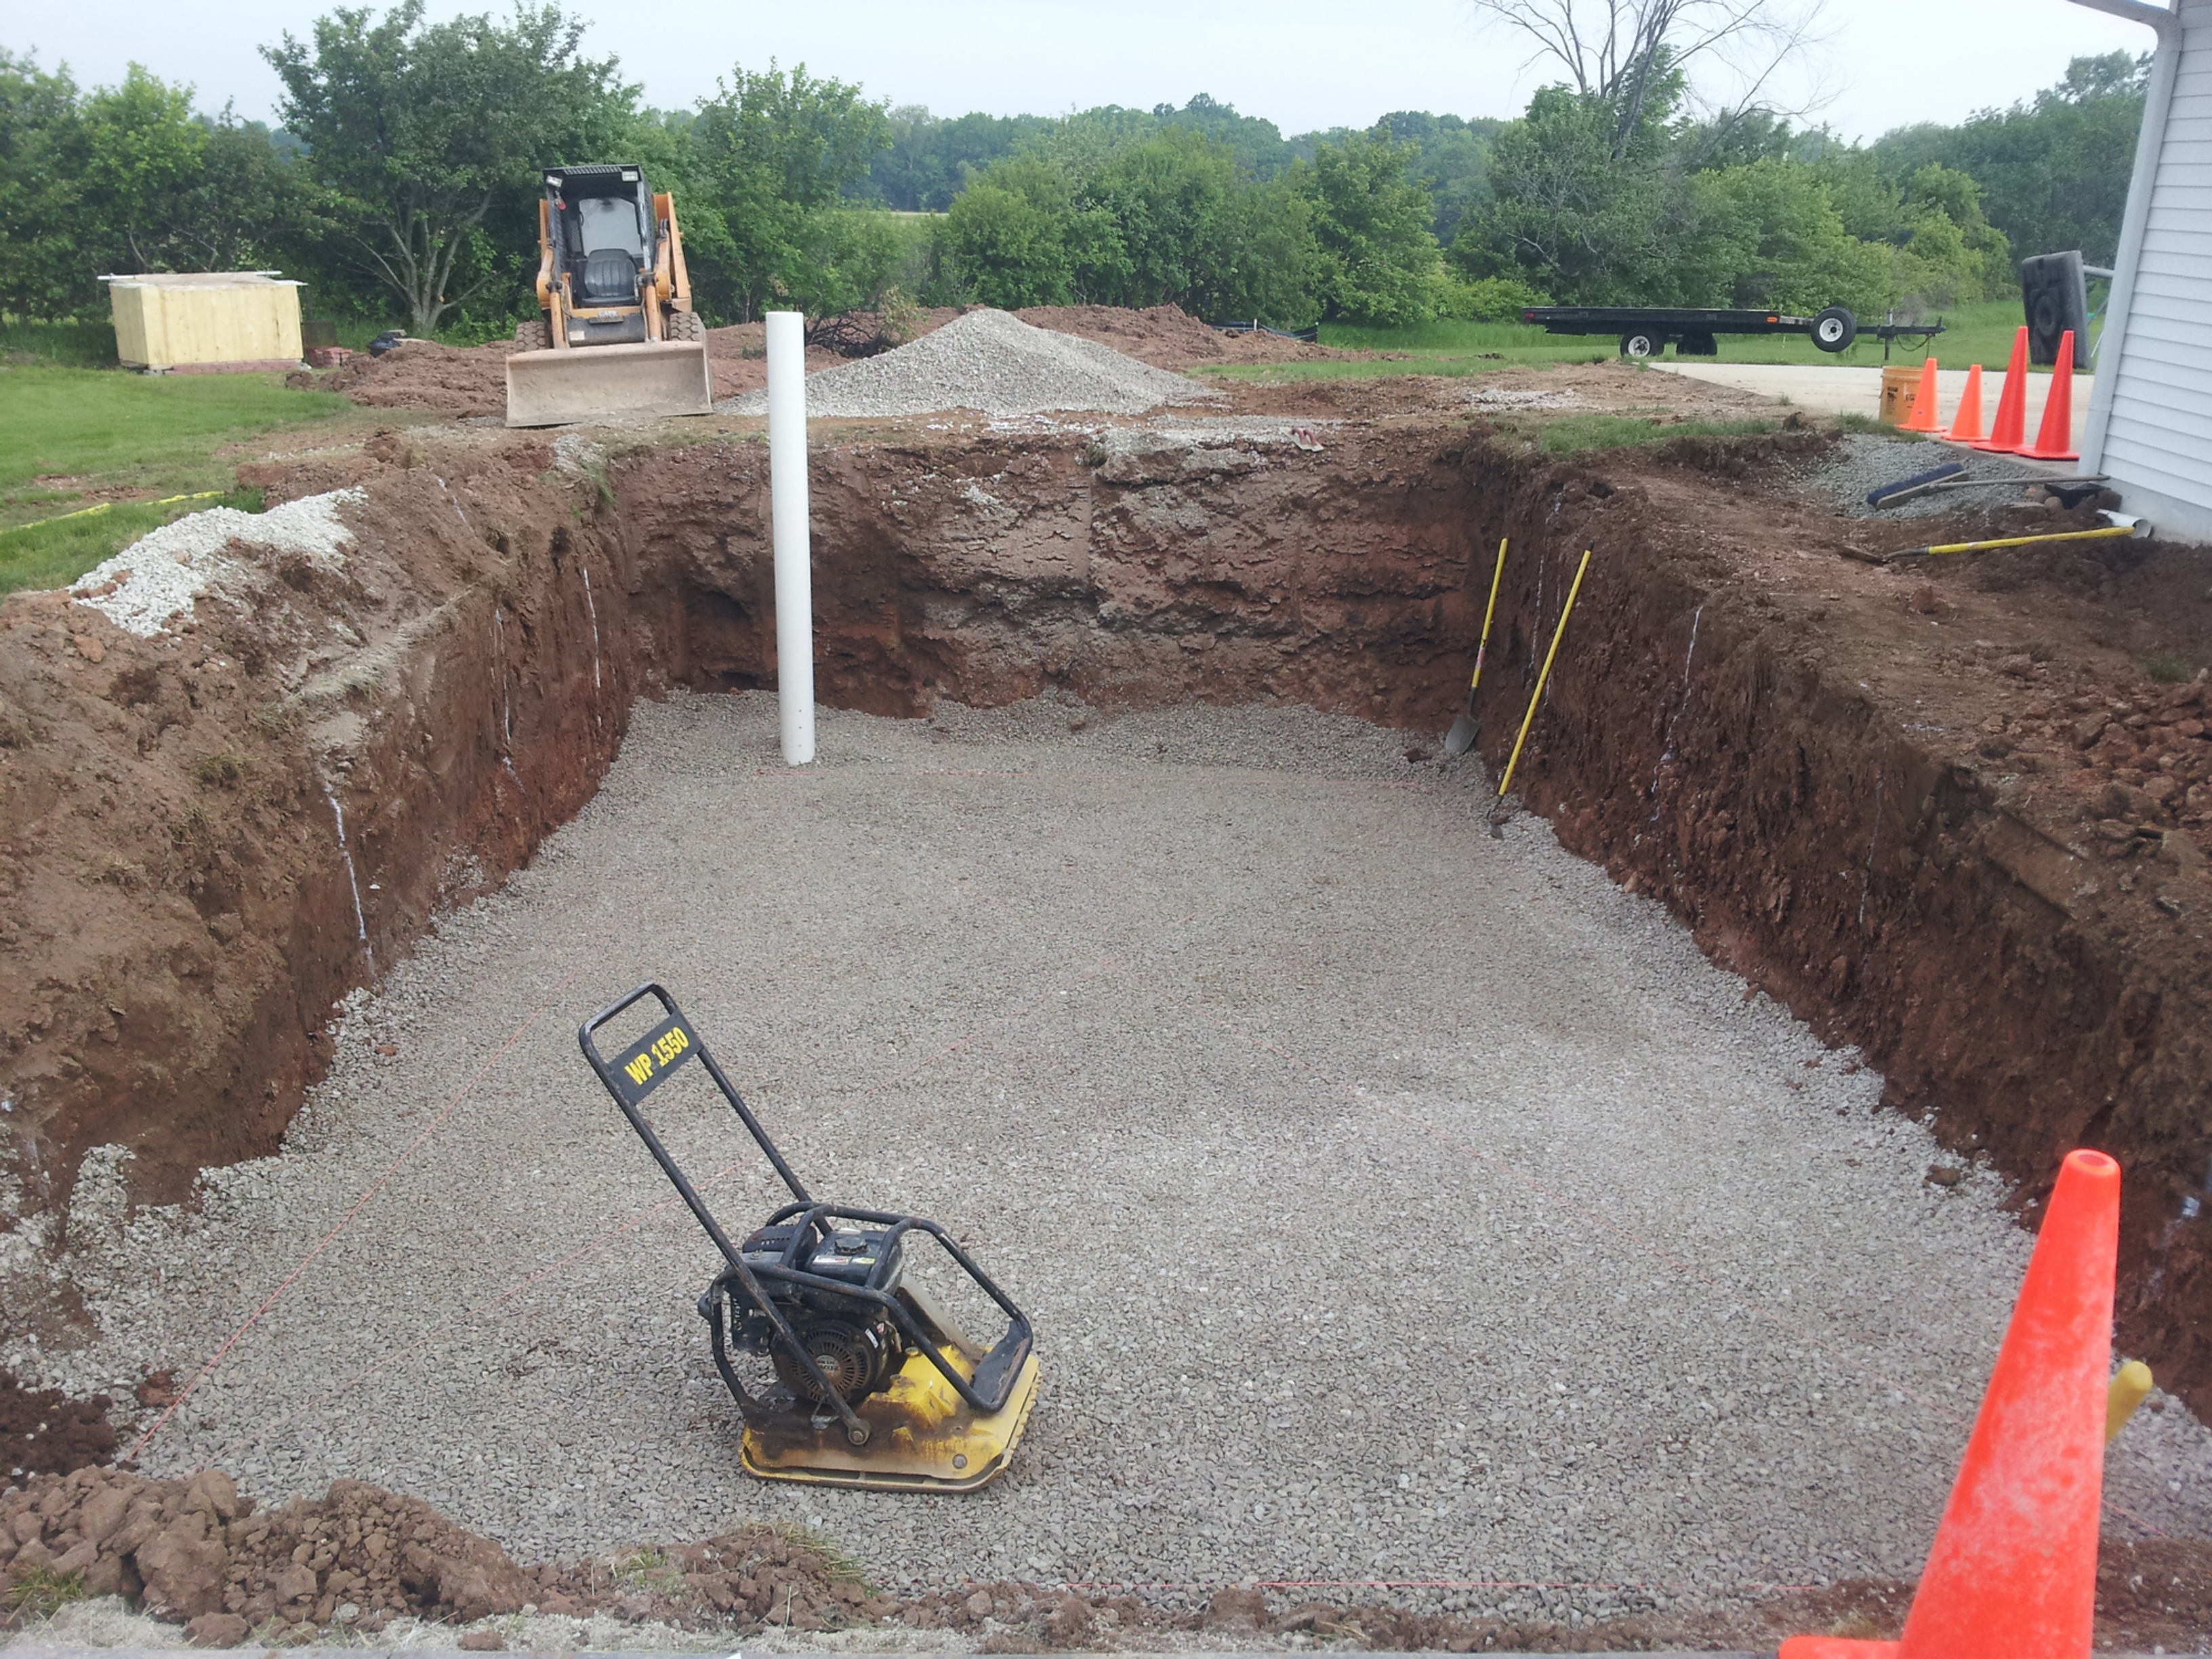
1. Your soil hasn’t been tested and is likely unsuitable to support the weight of a patio or pool deck.
2. If the soil is good, it’s very, very difficult to compact the soil to an acceptable level.
3. In my experience the probability is high that there will be settling issues down the road. What may save you a few hundred dollars now can cost you thousand in a few years. This settling typically takes place long after the workmanship portion of the warranty of your builder has expired. At Performance pools we will not do this because we build pools to last a lifetime not 3-5 years.
6: POOL BASE LEVELING
The best way to correctly set a fiberglass pool in my opinion is to ensure it is set level on the initial set. This is done by strictly following the dig specs from the manufacturer. It is very difficult and costly to set, adjust, reset and adjust,etc. It pays huge dividends to take the extra time to fine tune the base the first time. Solid Process, Solid Results.
7: IMPROPER BACK-FILL MATERIAL
DO NOT, I REPEAT DO NOT use dirt dirt to back fill your pool. 3/4″ clean gravel and sand (under the correct circumstances) should be used to back-fill a fiberglass pool. dirt, clay,etc wont compact on placement and will settle. There is no way around it. Cutting costs buy using dirt as a back-fill is only going to lead to you spending considerable money down the road to do it all over again when settling damages the pool, the deck and more!
Mistakes are a fact of life. It is the response to error that counts.” – Nikki Giovanni
water shape magazine
pool and spa professional magazine
Our pool had been set and backfilled. It Has a sun ledge but when we tested it out and step down into it you can feel it vibrate and give out a little as something you might see in a poorly supported fiberglass bathtub. Is this something that can be corrected by digging out the backfill at that end and redoing it?
Thank you in advance.
This is very instructional.. I am dealing with a pool that was installed in the wrong way .. I have had leaks in the last 10 years and this summer one of the leaks caused my pool bottom to bulge and it cracked.
I have dug out all the backfill (massive job to do) and plan to replace it with clean stone.
I recognize the fitting comment in the article as I had the same issue with Hayward snd I switched to the other one which doesn’t have the risk of thread breaking
I found it interesting how you mention to handle the plumbing .. I plan to redo the plumbing and plan to have a separate line for each return. If I ever have a leak again I can determine which return / pipe by pressure testing each of them. If all pipes are connected it is impossible to determine where the leak is. Most of the time the leak is with the fitting. In my 10 years of trouble.
One suggestion I would make . I’m my case I live next to a few creeks .. there is slot of groundwater and the soil is pure clay. The builder has done a poor job with the backfill which was a combination of sand and dirt. After doing a lot of research I believe groundwater control is key to prevent this ever happening again. My plan is to install on each side and eeriest point of the pool (approx 2 ft below the lowest point a 10 inch schedule 80 pipe that will dit in the clean stone and in which I will have a sump pump that will constantly take out the groundwater and direct it far away from the pool.
I do have questions on what material and what approach to use to repair the pool cracks (totaling 50 ft in the shape of an X) I have received so many suggestions from professionals and they are all different. Which drives me crazy. One company suggested to use 36oz fibreglass cloth / resin (very high quality and density) and place 3 layers in and over the cracks and cutouts. This would be applied on a concrete foundation that I would apply under the remaining old fibreglass within the cracks. Another company suggested to put plywood under the bottom of the pool and screw the remaining fibreglass to the plywood. And reuse the fibreglass I cut out and screw the cutouts back into the cutouts and then apply a 1708 fibreglass cloth inside the cracks and 3 layers on the entire pool
I can go in and on but none of the quotes I got is consistent and none addresses the root cause of the problem either.
Would interested in your opinion / thoughts
I have a fairly stressful job but nothing compares to the stress I have gone through dealing with my pool catastrophe.
Thanks
George
8433005677
I had an unground pool installed in 2009, we watched the work and notice soon after the pool was set and the concrete poured that it seemed a little off or lower on one side. But the contractor said that it’s acceptable being off a little. I did notice that they used the same material that was dug out of the hole was put back in with more sand to level off the area all around. we never had a thing like this done so we believed the contractor. As time went on the pool looked more uneven, as well the color was fading in on the inside surface. the contractor said it’s not unusual for it to change a little, so he put in tile all around the area by the concrete. Now, after all these years and repairs done to the pipes the the water flows into the pool had to be repaired, concrete cut , pipes fixed and concrete replace, but it’s noticeable. It should have been lifted out, braced and made to not be able to shift. we are 3″ off on the shallow side . My question is, how and what can be done to fix the completely. I know it could be costly. this work was done here in Emerald Isle by Bluewater Pools
we are in out Lincoln NE, and we travel up to 100 miles radius
I may need a contractor to repair this problem
I had a fiberglass pool installed and the installer had support beams across each end of the pool and nothing across the center now the pool is is low in the middle and each end of the pool is about 3 inches higher than the middle. The installer will not fix the pool unless I pay for the rework. The pool install is so bad I have contacted the pool manufacturer to let the know the installer did not put a sump system under the pool. The manufactures warranty says the warranty will be null and void if no sump system was installed. We are having no luck getting this resolved. Is there any help you can provide?
please give us a call 402-601-6906